|
The mystical speed of house framing, my amazing crew, and black locust! ͏ ͏ ͏ ͏ ͏ ͏ ͏ ͏ ͏ ͏ ͏ ͏ ͏ ͏ ͏ ͏ ͏ ͏ ͏ ͏ ͏ ͏ ͏ ͏ ͏ ͏ ͏ ͏ ͏ ͏ ͏ ͏ ͏ ͏ ͏ ͏ ͏ ͏ ͏ ͏ ͏ ͏ ͏ ͏ ͏ ͏ ͏ ͏ ͏ ͏ ͏ ͏ ͏ ͏ ͏ ͏ ͏ ͏ ͏ ͏ ͏ ͏ ͏ ͏ ͏ ͏ ͏ ͏ ͏ ͏ ͏ ͏ ͏ ͏ ͏ ͏ ͏ ͏ ͏ ͏ ͏ ͏ ͏ ͏ ͏ ͏ ͏ ͏ ͏ ͏ ͏ ͏ ͏ ͏ ͏ ͏ ͏ ͏ ͏ ͏ ͏ ͏ ͏ ͏ ͏ ͏ ͏ ͏ ͏ ͏ ͏ ͏ ͏ ͏ ͏ ͏ ͏ ͏ ͏ ͏ ͏ ͏ ͏ ͏ ͏ ͏ ͏ ͏ ͏ ͏ ͏ ͏ ͏ ͏ ͏ ͏ ͏ ͏ ͏ ͏ ͏ ͏ ͏ ͏ ͏ ͏ ͏ ͏ ͏ ͏ ͏ ͏ ͏ ͏ ͏ ͏ ͏ ͏ ͏ ͏ ͏ ͏ ͏ ͏ ͏ ͏ ͏ ͏ ͏ ͏ ͏ ͏ ͏ ͏ ͏ ͏ ͏ ͏ ͏ ͏ ͏ ͏ ͏ ͏ ͏ ͏ ͏ ͏ ͏ ͏ ͏ ͏ ͏ ͏ ͏ ͏ ͏ ͏ ͏ ͏ ͏ ͏ ͏ ͏ ͏ ͏ ͏ ͏ ͏ ͏ ͏ ͏ ͏ ͏ ͏ ͏ ͏ ͏ ͏ ͏ ͏ ͏ ͏ ͏ ͏ ͏ ͏ ͏ ͏ ͏ ͏ ͏ ͏ ͏ ͏ ͏ ͏ ͏ ͏ ͏ ͏ ͏ ͏ ͏ ͏ ͏ ͏ ͏ ͏ ͏ ͏ ͏ ͏ ͏ ͏
|
Sirona Falls March Newsletter!
|
|
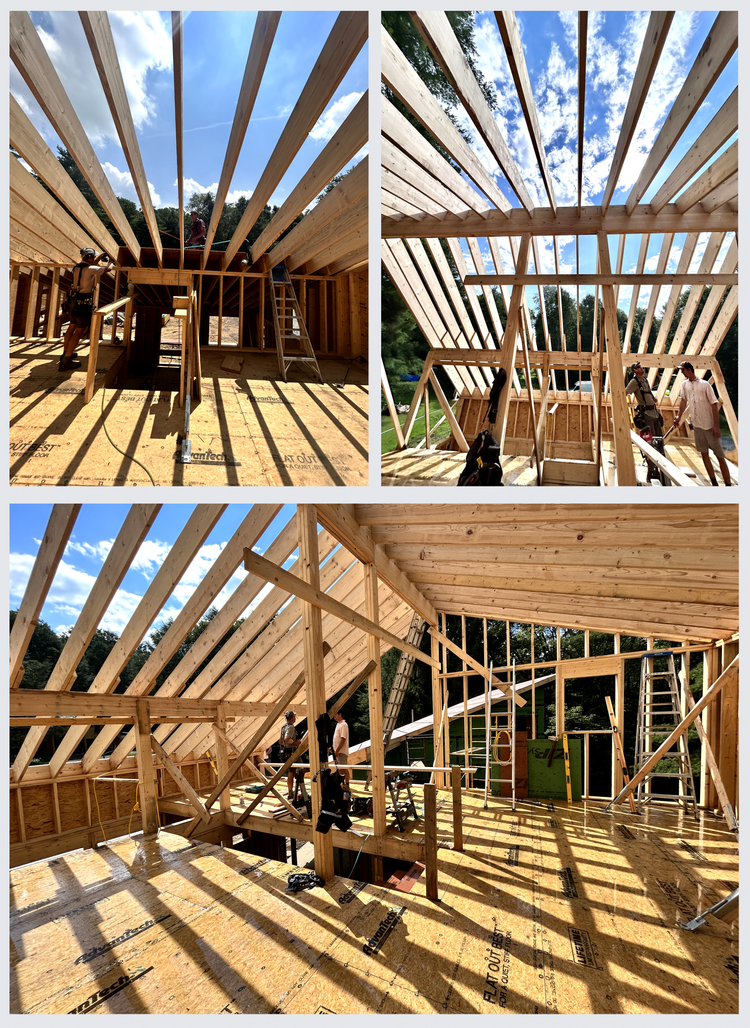
Marvelous windows to the sky and striped shadows during the framing process!
|
|
Hello Everyone, I hope you all are hanging in there and taking care of yourselves. Within all the devastation of the news cycle, I am grateful that in my daily life I spend my time passionately teaching art and stubbornly building my dream anyway. The cold has finally broken and longer, warmer, and brighter days are finally here. The Spring Equinox (March 20th) made it official, but the snowdrops and winter aconites blooming are all the proof I need. Now I can cheerfully recalibrate and start complaining about the cold anytime its below 40 degrees, which only a few weeks ago was rejoicingly warm. So fickle we are, us humans! This month, I will be sharing one of the most exciting stages of the project: the framing of the house. In two short months, I went from having just basements, to having the shell of the physical structure entirely built, occupying its space and looking and feeling like a HOUSE! Never mind that it will be more than two years of additional work for it to be a livable house. Nonetheless, the stages where big changes take place quickly are the most rewarding and exiting. I will also talk a bit more about the design, and my Hero’s of the month will be our crew of three guys who helped us with the big structural work in 2023: Chris, Seth, and Kenny. For my Nature Spotlight, I will talk about the Black Locust Tree. Wishing you all beautiful and joyous experiences this spring. Love, Elody
|
|
A volcano? An ancient ritual? Or a casual bonfire on top of the pile of excavation dirt before it was used as back-fill to celebrate the property’s closing anniversary! 5/6/23.
|
|
Young Black Locust trees in bloom - Image from Wikimedia Commons.
|
Nature Spotlight: Black LocustThis month I want to share about the Black Locust Tree, Robinia pseudoacacia. It is a pretty magical tree. It is very fast growing and creates indestructably hard and rot-resistant wood. It can be used for post holes or decking without being pressure treated, painted, or stained. The only challenge is that its so hard that it likes to eat your tools for breakfast. There may or may not be three drill bits stuck in one of my decks… I am sharing about these trees for three reasons: We are using locust wood a lot on my project. The magnificent trapezoidal shared deck on my house shown in this newsletter is made from locust. We also used it for the platform tent decks! I have some baby black locust trees growing on the property. My friend Andrea, a forester, gave me three tiny baby trees the first summer I had the land and I planted them, and I can attest to how fast-growing they are. They have already grown from barely over 12 inches to well over 6 feet with branches everywhere. See pictures below! You can eat their beautiful, white, wisteria-like blossoms! My favorite way is to treat them like a dessert: dip them in a batter, fry them into fritters, and serve them with powdered sugar. I will include a recipes below in the picture caption, but you don’t really need one. Here are my instructions: Find and harvest some fresh blooms in late spring. They’re abundant and easy to identify, here is an article on identifying and harvesting them. They grow all over the place along roadsides, the only challenge is finding some blossoms that are not too high to reach, and be mindful of the sharp thorns on young trees and low branches. Make your favorite pancake batter, thin it down a little extra so it is a bit runny, grab the flower cluster by the stem and dip the whole cluster into the batter, and fry them in a pan with a good bit of vegetable oil. Take them out onto a plate with a paper towel on it, and when partially cool sprinkle generously with powdered sugar. To eat them, you can either use the stem to pick them up and nibble the flowers off, or grab the stem and pull it out, leaving the flowers behind. Either way, the central stem is too tough to eat, but it keeps the cluster together for cooking. Delicious!
|
|
Above: A picture of black locust flowers and fritters from a simple vegan recipe. Below: Photos showing my locust trees at the end of their 1st, 2nd, and 3rd summers.
|
|
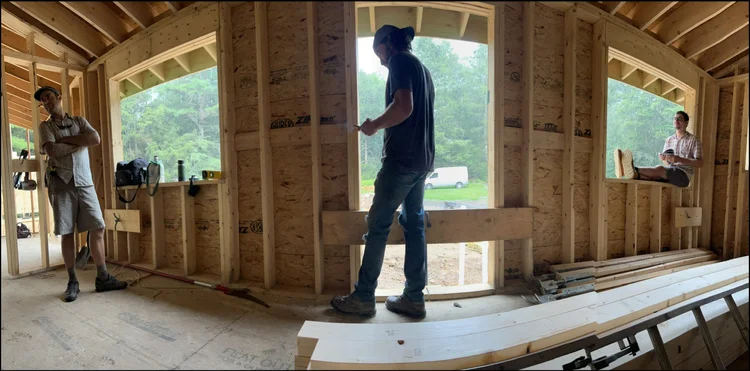
A panorama of Seth, Kenny and Chris sheltering when a thunderstorm halted work.
|
February’s Superheros: The Dream Team This month I want to talk about our dream team crew: Chris, Kenny, and Seth. They worked with us from March-November of 2023, building the barn, doing the foundation, framing the house, siding the house, and roofing the house. We went from nothing but strings on the ground marking the site in March to a mostly completed shell of a house in December with their herculean help. Every work day had us all taking lunch break together and often hanging out after work for an post-work beer, so even though I already knew all of these guys, we really became close friends. It was not your average construction crew, lots of laughter and fun were had! Here is a mini feature on each of them. Chris Adamski: Skills: Chris is an expert builder and carpenter with a wide set of skills and building knowledge and contributed collaboratively to the decisions on how we would do things and with what materials. He always has the best tools and is up and the latest methods, materials, and best places to source materials. He has very exacting standards… nothing will be sloppy or out of square on Chris’ watch! Snacks: You’ll never find Chris without at least two or three ways to make his food spicier, usually two hot sauces and a spicy powder of some kind to spice up his lunch. You can generally find him on the work site by following the trail of sunflower seed shells he likes to snack on! Seth Gordon: Skills: Seth is a skilled carpenter who often works with Chris. He is an excellent craftsman, incredibly methodical and precise. He was good at whatever you put him to, but his happy place is an independent project that puts to use his carpentry skills. While there were many minor injuries on the job, Seth came closest to getting really hurt when he did one of those “step backwards into empty space while carrying something” in early stages of framing the house, but was able to catch himself and get away from it with only some painful bruised ribs. Chris and Seth together did basically all of the framing of the whole house, putting together and raising every load-bearing wall. Snacks: Seth usually has an 11 am banana on hand to get him through to lunch time. His lunches often had some amazing garden-fresh produce or homemade sourdough bread in them. In the afternoon, a handful of peanut butter pretzels can get him through to the next meal! Kenny Lloyd: Skills: Kenny is a Jack-of-all-trades and master of Plumbing! Meaning, he has a huge list of skills, but as a profession he is an expert plumber. He is also really talented at driving any kind of machinery and did all of our additional excavation and earth-moving beyond that first single day of foundation digging with the large excavator. He also is an electrician, and did most of the electrical work on the house, and also was willing to lend a hand with whatever else was needed when there was not plumbing or electric or excavating to do, so he learned a lot of basic carpentry on our job. And he is tall and strong so there was also a lot of “Kenny can you help me carry this huge heavy thing”. He continued to help us in 2024 as well, since much of the plumbing/electric was done after the shell of the house was complete. Snacks: Kenny can be found by following the empty gatorade bottles he leaves in his wake, and always has something to satisfy each of his cravings, usually something sweet like Skittles or Starburst, something salty like Doritos or SunChips, and cigarettes!
|
|
The Dream Team kicking ass: top row Chris, middle row Seth, & bottom row Kenny.
|
Feature Project: Framing the HouseAs I mentioned in the intro, this stage was almost miraculously fast. From the beginning of July 2023 to the end of August, we went from having just a basement/foundation level that had a ceiling/floor of the first level, to having the skeleton of the physical structure entirely built, looking and feeling like a house. The other stages feel so slow by comparison, when during the framing stage there were often multiple walls going up in a single day… you just can’t beat that for dramatic visual changes! To really appreciate it, enjoy this video compilation that I made of these two months, here on Instagram or here on Facebook. The idea of a house as a physical body has really resonated with me through this whole project… a house has a skeleton (framing), a nervous system (electrical), a vascular and digestive system (plumbing), layers of fat (insulation), organs (heating systems and appliances), skin with multiple layers (siding, roofing) and interior linings (all the interior surfaces.) Layer by layer, we are building a structure with all of these systems integrated into it so it can live and breath with me all my life. And it all depends on the solid, stable, structure of the skeleton holding it up.
|
|
Building the trapezoidal shared porch from local black locust wood.
|
|
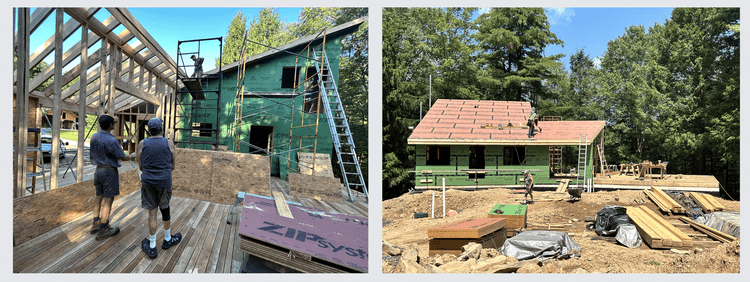
The Shared Porch: First we built the deck of the shared porch, out of the aforementioned gorgeous and incredibly durable and weatherproof black locust wood. If you recall from my brief description of the house design last month, it is really two small houses connected by a large shared porch and a small entry room that I am calling the vestibule. The porch happening first created a convenient staging area and also made the work areas safer… less edges to fall off of accidentally! The Guest Side: With framing, we began with the left side of the house, the Guest side. In each stage, we began with the first floor walls, then the joists to support the next level, then the floors for the next level, then the second story walls, then the joists to support the roof. As each layer is built, subsurface walls and floors and roofing material is put on, called a “Zip” system (specialized plywood of varying thicknesses, with the seams sealed with a special tape). You will notice the siding is green, roofing is red, and the floors are just plain old wood-colored. All of it will be covered with additional layers. The design of the guest side has a shed roof (a single pitch) so only about half of it has an upstairs, which is the master bedroom. This means that the front of the downstairs has a nice high ceiling in the entry and kitchen areas. In the back of the first floor is a living room and a second bedroom. The front area also has a bathroom, which will be ADA compliant, as will the entry and kitchen area.
|
|
Framing in the Guest side with the sloped roof and the partial second story.
|
|
My Side: After the guest side was mostly done, we built the “vestibule” room in the center off of it, and from there we began on my side! The footprint of the two sides is exactly the same, but the design and roofline are quite different, giving me a much larger upstairs that will be my art studio. The gable roof gives me high ceilings, and the studio will be divided into one large work area for creating large artworks and teaching small in-person classes, a smaller area for my online teaching/computer/office area, and a storage area with a utility sink. The downstairs will have everything essential for my life: an entry area, a bathroom, a kitchen, a large bedroom that will also double as a living-room, and a laundry room. The vestibule connects to the bathroom, so if I am ever hosting events I can open up my bathroom to provide an additional restroom.
|
|
Above: adding the vestibule. Below: my side being framed, with its taller, gabled roof for a larger second floor for my studio. Final image on bottom right is me “cheers-ing!” my house with a beer the day the framing was finished! Ta-Da! The Skeleton of the house!
|
|
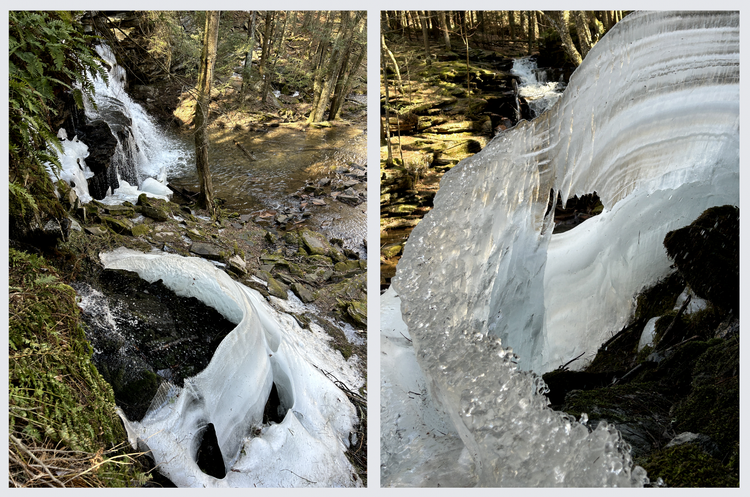
The ice saga continue: These photos were taken on March 7th. The huge ice formations slowly melted to reveal interesting striations and new splatters on cold nights built more ice on the surfaces, creating fascinating shapes and textures.
|
|
|
|